Bubble Flow Bucket Nutrient Guide 0
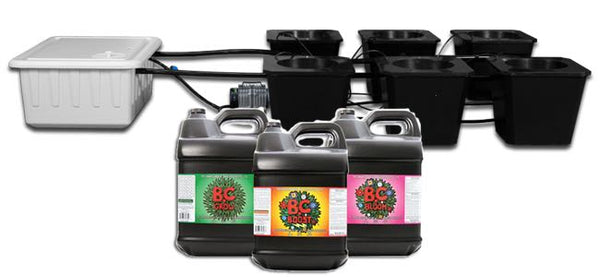
Knowing what kind and how much nutrients to use can be confusing for new growers. This guide is to help growers using one of our most popular systems, the SuperCloset Bubble Flow Buckets.
If possible, I always recommend buying all the nutrients you'll need for your grow beforehand. It allows you to buy in bulk and save some money and will keep you from making emergency runs to your hydro shop (or rushing shipping) when you realize you're out.
Whatever you do, don't let your babies starve!
The amount of nutrients you'll need will depends on a lot of factors so let's make some assumptions to use for our calculations.
1) We're using a 6 Site Bubble Flow Bucket system.
It comes with a 25 Gallon reservoir and 5 Gallon sites. For the 6-Site system that means we'll have about 55 gallons (25 from the reservoir and 30 from all 6 buckets) for maximum capacity, but let's plan around using 50 gallons.
Here's what each system can hold:
| Sites | Amount of Water |
| 6 | 50 Gallons |
| 12 | 75 Gallons |
| 24 | 150 Gallons |
If you have a 12 Site then multiply everything by 1.5 and if you have a 24 Site then multiply by 2.
If you're using another system, hopefully you can use the same technique to find out how much you'll need.
2) We're going to use TechnaFlora nutrients.
They're reliable and known to work well for hydroponics. I used their nutrient calculator to get most of these numbers.
3) We'll have a 6 week vegetative phase and 10 week flowering phase.
This is an overestimate but it's always better to have a little extra than not enough.
4) We'll plan to change the water every 2 weeks.
You can change your water weekly but you'll use twice as much nutrients and usually won't get much out of it.
This means we'll have 3 water changes in our 6 weeks of veg and 5 water changes in our 10 weeks of flowering.
OK, now let's look at how much nutrients we'll need. To keep things short, I'm not going to go into much detail about why we're using each nutrient.
Single Water Change - Vegetative
| Nutrient | Amount |
| B.C Boost | 3⅛ cups (.75 liters) |
| B.C Grow | 1½ cups (.36 liters) |
| Thrive Alive B-1 Red | ½ cups (.12 liters) |
| MagiCal | ½ cups (.12 liters) |
| SugarDaddy | 2 cups (.48 liters) |
Single Water Change - Flowering
| Nutrient | Amount Needed |
| B.C Boost | 3⅛ cups (.75 liters) |
| B.C Bloom | 3⅛ cups (.75 liters) |
| Awesome Blossom | ½ cups (.12 liters) |
| Thrive Alive B-1 Red | ½ cups (.12 liters) |
| MagiCal | ½ cups (.12 liters) |
| SugarDaddy | 2½ cups (.6 liters) |
So what will you need in the end? We'll multiply what we need for a single water change in veg by 3 and what we need for a single water change in flowering by 5 to get our totals.
Total Nutrients
| Nutrient | Vegetative | Flowering | Total |
| B.C Boost | 2.25 liters | 3.75 liters | 6 liters |
| B.C Grow | 1.08 liters | - | 1.08 liters |
| B.C Bloom | - | 3.75 liters | 3.75 liters |
| Awesome Blossom | .6 liters | .6 liters | |
| Thrive Alive B-1 Red | .36 liters | .6 liters | .96 liters |
| MagiCal | .36 liters | .6 liters | .96 liters |
| SugarDaddy | 1.5 liters | 3 liters | 4.5 liters |
What to Buy
Unfortunately, you can't buy these exact amounts of nutrients. They're mostly available in 1 L, 4 L, and 10 L containers. Here's what I think makes the most sense based on what's available and pricing (at time of writing).
B.C Boost, 10 L

Provides Calcium and Iron that your plants will need for both vegetation and flowering.
Note: It's about the same price as two 4 liter bottles, might as well get the extra
B.C Grow, 4L

Contains a full compliment of nutrients for vegetative growth.
Note: It's about the same price as two 1 liters, you'll have a lot extra.
B.C Bloom, 4L

Contains a full compliment of nutrients for healthy bloom / flowering.
Awesome Blossom, 1L

This ultra-fertilizer will increase your harvest size by providing a boost of sugar phosphates.
Thrive Alive B-1 Red, 1 L

A plant tonic that encourages healthy root development.
MagiCal, 1 L

A blend of magnesium, iron and calcium that promotes vigorous and healthy plant growth
1x Sugar Daddy, 4 L and 1x Sugar Daddy, 1L


Supplies essential carbohydrates and all twenty amino acids necessary in all phases of plant growth.
Notes: You could also go with the 10 L option if you want to have enough for your next grow too.
There you have it. That should be everything you need for vegetation and flowering. Hope that helps!
- Trevor
- Tags: Beginner Guide Hydroponics Nutrients SuperCloset
Five Fruits and Vegetables for Your Hydroponic Garden 0
You’ve got your hydroponic system, now what? It’s time to get growing!
Let’s look at 5 fruits and vegetables that are ideal for growing in your indoor garden.
1. Spinach
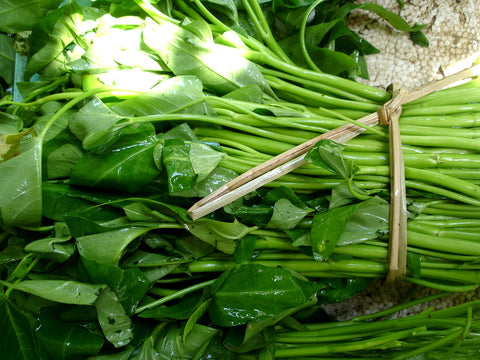
The health benefits of this leafy green vegetable makes it a great addition to any healthy diet; spinach can be juiced, sautéed or eaten raw. This unassuming plant is right on top of the list of plants that a beginner can grow in a hydroponic garden. Spinach grown using this method can be harvested all at once, or snipped off bit by bit, leaving the rest of the plant to keep growing.
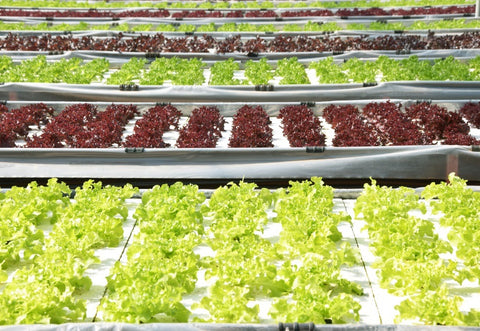
2. Lettuce
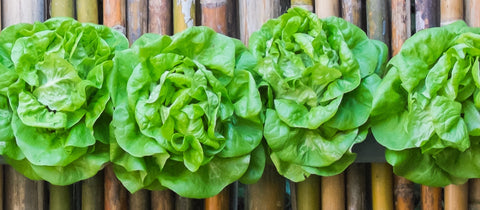
Like all leafy green vegetables, lettuce is a great base for sandwiches and salads. The heads grow rapidly, and are easy to take care of. Good choices are Boston, bib, or butter crunch leaf lettuce. Lettuce is perfect for indoor hydroponic gardens because it gets protected from the sun, keeping it from burning. In many cases, the shade can buy a few more weeks of harvest time than you’ll have from lettuce grown in the sun. Lettuce requires cool ambient temperatures of around 75 degrees Fahrenheit during the day and 55 degrees Fahrenheit at night.
3. Strawberries
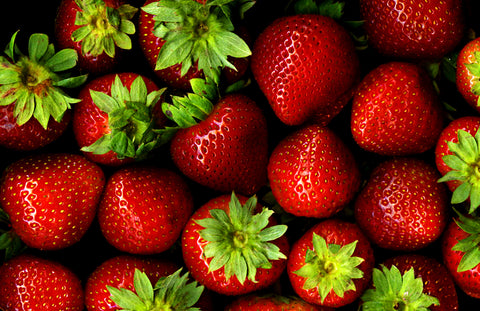
Imagine having fresh, homegrown strawberries at your disposal all year round! To get started, you will need to purchase a few strawberry starter runners from a garden supply store, and throw them in your refrigerator. This cold stimulation is designed to help jumpstart the growing process, which means that the strawberry plants will be able to flower soon after planting.
4. Tomatoes
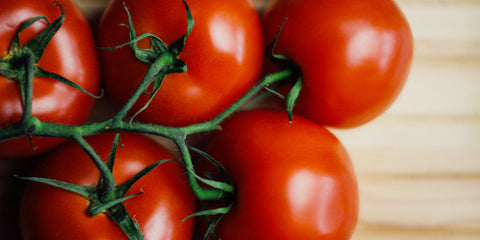
Useful in so many dishes, tomatoes are both nutritious and flavorful. The fact that tomatoes are vine plants makes growing these fruits in a DWC (Deep Water Culture) hydroponic system piece of cake. We recommend disease resistant varieties such as Daniela as this reduces the level of care required.
If you’re growing tomatoes you’ll need a trellis or some other kind of support system so the vines can grow out. They prefer a warm growing temperatures so the daytime temperature should be ideally set at 70-79 degrees Fahrenheit and 61-65 degrees Fahrenheit at night.
5. Peppers
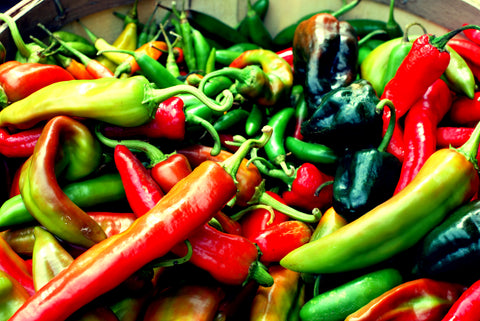
Peppers are relatively easy to grow. They prefer warm growing temperatures, similar to tomatoes. However, fruit production can be raised by increasing the nighttime temperatures and slightly decreasing the daytime temperatures while ensuring that they are irrigated with feeding solution up to 6 times a day. Avoid bell peppers unless you have plenty of space in your system. The best pepper varieties to grow hydroponically include green peppers or hot peppers such as cayenne, habanero, and jalapeños.
What have you had success growing in your indoor garden? Good luck with your growing!
- Trevor
- Tags: Beginner Guide Hydroponics
How to Use Your Bubble Magic Extracting Washing Machine 0
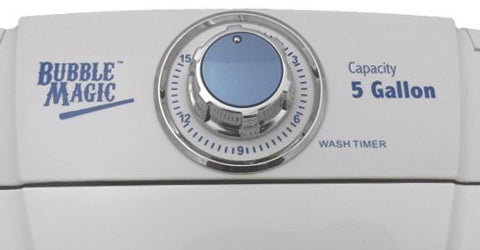
So you’ve got your new Bubble Magic Extracting Washing Machine and now you’re wondering how to use it?
We’ve got some simple instructions to help you get started with ice water extraction (IWE).
This is a super easy process, doesn’t take too long, and is a great way to make lavender and other herbal extracts.
Here’s what you’ll need before we get started:
- Bubble Magic Extraction Machine: Five or Twenty Gallon model
- 1 Zipper Washing Extraction Bag
- Set of Extraction Bags (Depending on the set, this could be a set of 3,4,5, or 8 bags)
- 1 bucket equivalent in size to your extraction machine. 5 Gallon bucket for 5 Gallon Extracting Machines, 20 Gallon Bucket for 20 Gallon Extracting Machines.
- Ice and water — Preferably RO (Reverse Osmosis) water for best results.
- Flat drying sheet (For when we’re done)
- The plant material — It’s best if this has been in the freezer for at least one hour before starting the extraction process.
1) Prepare your bags and bucket
Line your bucket with extraction bags. Start with the lowest micron bag you have. This should be the 25 micron bag. Once that’s in, line the bucket with the next largest bag. Repeat until all your bags are lining the bucket with the largest micron bag (typically the 220 micron bag) on top.
2) Prepare the extraction machine
Fill the machine to about half way with a mixture of RO water and ice. A temperature of about 41 F is ideal.
3) Prepare your plant material
Add your frozen (remember, it should have been in the freezer for at least an hour before starting!) plant material to your washing extraction bag.
Zip it up. Don’t forget to double check the zipper to be safe.
4 ounces is a good amount of material for the 5 gallon machine.
4) Add the plant material and start the Bubble Magic Extracting Machine
Place the bag containing your plant material into the extracting machine. Add more RO water and ice until the machine is full.
Set the timer for 15 minutes and let the machine go to work!
You should see a nice foamy head with the machine running.
5) Remove the bag
Once the 15 minutes are up it’s time to drain. Start by taking the bag out of the machine. Squeeze any excess water/plant mixture out of the bag and into the machine then set the bag aside.
We’re done with it.
6) Drain
Take the drain hose and place it into the bucket/bag setup we made earlier. Switch the machine into drain mode and let the mixture flow out. Rinse the machine with water to get everything drained out.
7) Collect
Slowly remove the top bag from the bucket. Rinse with water to flush any excess material. Turn it inside out and collect your material. Place it on the drying sheet. Repeat for each bag.
There you have it, you’re done! Hope that helps. If you have any other ice water extraction tips, let us know, we’d love to hear them!
If you're interested in getting started with ice water extraction we have the 5 Gallon Bubble Magic Extracting Machine plus Extraction Bags as well as the 20 Gallon Bubble Magic Extracting Machine plus Extraction Bags available in the store!
What's Hydroponics? 0
New to the indoor gardening world?
You've probably seen words like "hydroponics", "aeroponics", and maybe even "aquaponics" thrown around a bunch.
Sounds confusing?
It all can seem a bit scary at first, but I promise getting started is way easier than you think!
You just want to grow healthy plants, not get a degree in Horticulture (yet!).
Today, let's talk a bit about what hydroponics is, why you should care, and how you can start your own hydroponic garden.
Usually, we grow plants in soil. No surprises there. It seems pretty necessary, right?
Hydroponics is growing without soil, and it's a great technique for growing vegetables, fruits, and herbs indoors.
"But wait, how will plants get there nutrients and water? They need soil!”
You’re right, plants do need nutrients and water, but we can provide that to them dirt free by soaking the roots in a nutrient and water mixture. Hydroponic systems let us do that.
And guess what? Plants love it!
Since we can give our plants the exact nutrients they need they grow faster, can be grown more densely, and are just as happy and healthy as their brothers and sisters that grew up in soil (ok, maybe they're even a bit happier). Hydroponic greens are softer, taste better, and can contain 50% higher levels of vitamins A, B, C, and E.
It's great for us gardeners too, hydroponic gardens are low-maintenance and don't require tilling, spraying pesticides, fertilizer, are free of soil borne diseases, and don't require wedding (that's right, no more weeding!).
Hydroponics means less work and stress, more yummy food.
"Ok this sounds great, but it all sounds a bit 'unnatural', is this even organic?"
Let's talk about this one for a bit because I think it's a big concern for all indoor gardening. Neither herbicides nor pesticides are used in hydroponics.
They don't go in your plants and they don't go in your body.
What's great about hydroponics is that we are in control of the environment. We know exactly what's going into our food.
We can grow healthy crops in a consistent, reliable, and sustainable way.
"But why bother? Soil has worked fine so far."
Maybe you live somewhere that doesn’t have good year round weather for growing plants, now you can grow indoors with your hydroponic system and always control the climate.
Maybe you live in a city and don’t have a backyard to garden in. Hydroponics lets you bring it inside.
Maybe you’re a farmer and the more you can grow the better you can provide for your family. Plants grow more quickly in hydroponics systems.
Maybe you just want to grow in an enviromentally friendly way. Hydroponics uses far less water than traditional growing techniques, so you're helping conserve water.
I could keep going all day, but you've probably had enough!
We live on a beautiful planet and it’s amazing what grows right out of the ground.
But, there are a lot of great reasons to ditch the soil and grow plants that are good for your body in a way that's good for the earth too.
Want to get started?
Check out the SuperPonics 16 and the AeroFlo 18.
They're both great for beginners, provide everything you need in a hassle free setup, and will have you growing in no time.
If you're really serious and want everything taken care of right down to the last detail then take a look at these grow cabinets.
Hope that helps clear things up and you're excited about adventuring into hydroponics!
If you have any questions I am always more than happy to help and am just an email away.
- Trevor
- Tags: Beginner Guide Hydroponics