News
LED Grow Lights for Your Grow Operation 0

Around here, we recommend LED Grow Lights for both commercial growers and hobbyists.
With today’s technology, they are the best and most efficient way to grow.
Most growers out there have experience with HPS grow lights, they’re a proven and reliable technology, reasonably priced, and in terms of raw power are really tough to beat.
So, why use LED grow lights?
One word. Efficiency.
1000 Watt HPS grow lights are the gold standard for commercial growers. Let’s see how a typical 1000W HPS light compares to an equivalent LED grow Light.
Efficiency
There are three main benefits LED grow lights have over HPS that we’ll talk about now: Low Power, Low Heat, and Low Maintenance
Low Power
By design, LEDs more energy efficient. Typically, you’ll see around a 30-40% energy savings. For example, the Kind K5 XL1000 is designed to replace a 1000 Watt HPS but will typically draw 650 Watts. That’s a 35% savings in electricity. If you’re running many lights or are in an area that has expensive electricity, cutting that monthly power bill will end up saving you a ton of money in the long run.
Low Heat
If you don’t properly manage the heat levels in your grow room then your plants won't survive. With HPS that typically means additional fans, ventilation and in many cases, air conditioning. You’re spending money on lights that heat up your grow room and then spending more money on equipment to cool your grow room down to safe levels for your plants.
That’s not just expensive, it’s wasteful.
This is where LED grow lights really shine (consider yourself lucky that's the only pun I’m slipping into this article). Yes, you get a huge energy saving just by using LEDs, but you save just as much if not more by reducing cooling (a.k.a HVAC) costs.
Depending on where you’re located, even running only a few 1000W HPS lights will require an AC unit. Each AC unit can cost as much as an HPS grow light and use just as much energy. If you’re running a larger commercial operation, you’ll need an HVAC professional to come in and make sure your grow room is properly cooled - that’s more equipment you’ll need to buy and have professionally installed.
With LED grow lights you’ll spend less money on equipment and the power required to run it. How much less? That 30-40% energy savings mentioned earlier is more like 50-60% when taking into account HVAC costs.
Low Maintenance
HPS lights require a bulb replacement roughly every 9 months. The bulbs aren’t cheap and if you don’t replace them frequently, your crop quality will suffer. LED grow lights don’t need bulb replacements. They also don’t require the same inrush current to ignite their bulbs, and are safe to plug into a standard wall outlet. That means that you don’t need to spend money buying the special lighting controllers that you’ll need to run multiple 1000W HPS lights.
Between the bulbs, lighting controllers, and cooling equipment, you’re left with a lot less equipment to purchase, manage, and maintain.
With LED grow lights you’ll have a leaner, greener, and easier to manage grow operation.
Yields
Many LED grow lights will claim that they not only use less power than HPS but they also will produce higher yields. Its been my experience that most LED grow lights will produce nearly equivalent yields, edging out HPS in many cases.
However, high quality LED grow light can increase your yields significantly. In this side-by-side study, the Black Dog PhytoMAX 800 increased yields over a 1000W DE HPS by more than 25% while reducing HVAC costs by 50%.
Concerns
The efficiency of LED grow lights is attractive, but experienced growers still usually have two main concerns: Spectrum/Penetration and Cost
Spectrum / Penetration
5 years ago this was the main problem with LED grow lights. They either didn’t have the right spectrum or didn’t have the canopy penetration necessary to flower properly. Thankfully, the technology has caught up. Today, you'll hear different brands claim that their custom spectrum is the only one that is perfect for your plants, but one thing is certain - these lights can grow.
Cost
The upfront costs of LEDs are significantly higher than traditional HPS grow lights. Sometimes you might not have the cash on hand or just not be comfortable spending so much on a single fixture.
As growers that spend months meticulously caring for our plants before we can harvest, we’re used to thinking long term. And in the long term, you’ll end up spending significantly less by using LED Grow lights.
Let's look at a simple scenario comparing a single 1000W HPS to a Kind K5 XL1000.
Some things to keep in mind:
- A typical 1000W HPS will actually draw around 1150 Watts due to the power drawn by the ballast.
- The lights are on 24 hours a day during vegetative growth and 12 hours a day for flowering.
- We’ll spend about a third of our time in vegetative growth and two thirds of our time flowering.
- HPS lights will require additional ventilation for cooling. A $100 and 110 Watt fan should do the trick.
- Grow light bulbs should be replaced every 9 months and cost around $50 each.
- Cost of electricity will vary a lot depending on where you’re located but let’s say it costs 10 cents per killowatt hour for the sake of our calculations.
To calculate the cost of electrcity for one year let’s assume we will spend about a third of our time, or 122 days of the year, in vegetative growth with our grow light on for 24 hours and the remaining 243 days in flowering with the light on for 12 hours. To calculate the cost it is:
Number of days * Number of hours on per day * cost per kilowatt hour * kilowattage
In the case of our LED that draws 650 Watts, the Kilowattage is .65. The HPS draws 1260 Watts it has a 1.25 kilowattage.
So let's look at a single light cost of ownership.
|
|
LED |
|
HPS |
|
|
Initial Cost |
Kind XL1000 |
$1695.00 |
Ballast |
$320.00 |
|
|
|
|
Reflector |
$130.00 |
|
|
|
|
Bulb |
$50.00 |
|
|
|
|
Ventilation Fan |
$100.00 |
|
|
Total |
$1695.00 |
|
$600.00 |
|
Wattage |
Kind XL1000 |
650W |
Bulb |
1000W |
|
|
|
|
Ballast |
150W |
|
|
|
|
Ventilation Fan |
110W |
|
|
Total |
650W |
|
1260W |
|
Electricity per Year |
Vegetative |
$190.32 |
|
$368.93 |
|
|
Flowering |
$189.54 |
|
$367.42 |
|
|
Total |
$379.86 |
|
$736.34 |
|
1 Year Cost of Ownership |
Initial Cost |
$1695.00 |
|
$600.00 |
|
|
Electricity |
$379.86 |
|
$736.34 |
|
|
Bulb Replacement (1) |
$0.00 |
|
$50.00 |
|
|
|
LED |
|
HPS |
|
|
Total |
$2074.86 |
|
$1386.34 |
|
3 Year Cost of Ownership |
Initial Cost |
$1695.00 |
|
$600.00 |
|
|
Electricity |
$1139.58 |
|
$2209.03 |
|
|
Bulb Replacement (4) |
$0.00 |
|
$200.00 |
|
|
|
LED |
|
HPS |
|
|
Total |
$2834.58 |
|
$3009.03 |
|
10 Year Cost of Ownership |
Initial Cost |
$1695.00 |
|
$600.00 |
|
|
Electricity |
$3798.60 |
|
$7363.44 |
|
|
Bulb Replacement (13) |
$0.00 |
|
$2600.00 |
|
|
|
LED |
|
HPS |
|
|
Total |
$5493.60 |
|
$10563.44 |
In the worst case, you’ll break even after about 3 years. That's a decent return in most cases.
BUT, if you take into account the potential for increased yields and the fact that you will need a more substantial HVAC system for an HPS operation, the break even point comes much more quickly
Check out the ROI calculation for the Black Dog PhytoMAX 800 side-by-side study here. They broke even in under a year.
Most LED grow lights are are rated to last at least 10 years when used in a standard grow cycle. They’ll have more than pay for themselves in savings by the time you’re ready to upgrade, even if you only wait 5 years. Also, given the pace of LED grow light development, the top of the line models that you upgrade to 5-10 years down the line are going to be far more power efficient and produce even better crops.
Quality
It’s really easy to find bad LED grow lights. Many manufacturers out there use low quality components or diodes that are simply not designed to grow plants.
My advice, before you buy a grow light of any kind, make sure you can find some grow journals online that show good results.
Do a bit of research and leverage other grower’s experience so that you get a light you know will work. If you find a super cheap grow light that’s promising a huge footprint, perfect spectrum, 70% energy savings over HPS, and no one on the internet has anything to say about it, you should be extremely skeptical.
Think about the long term.
LED Grow Lights aren’t going away. They’re only going to get better and cheaper. If you’re starting or upgrading your commercial operation then LED grow lights will be a huge competitive advantage. Your electricity bill will be far lower, especially during hot summer summer months, you’ll spend less money and resources on managing heat issues, and you’ll be growing amazing crops.
Conclusion
I hope you’re excited to try out LED grow lights.
There’s a lot of information out there and it can be hard to tell what’s real and can be trusted. The numbers I used for our analysis were estimates, but I tried to keep them reasonable. If something looks off, let me know!
LED grow lights aren’t some magical technology that will you turn into a master grower overnight. They have their advantages and disadvantages but, as you've seen, it’s not too difficult to calculate if they’ll be worth it for you. They’ve been worth it for me and the growers that I’ve helped get set up, and I really think now is a great time to make the switch.
Need help getting LEDs for your grow room? We'll do a free consultation and help you get everything you need to start growing!
Just sign up here to get in touch with one of our expert growers.
Any questions? Either leave a comment or shoot me an email at trevor@allgreenhydroponics.com!
- Trevor
Hydroponics for Your Grow Operation 0

Today I want to talk about why you should be growing with hydroponics.
If you're starting a commercial grow operation, it's definitely something you should consider. If you've never grown before and have been spending hours researching how to get started or if you've grown with soil before and keep hearing about growers getting amazing results with hydroponics, then this article is for you. You'll get a quick overview of hydroponics, when to use it and when not to, and what you can do next.
Let's get started!
What is Hydroponics
Check out this blog post.
In short -- Hydroponics is growing plants without soil. Compared to growing with soil, you can grow more densely and produce larger plants in a shorter amount of time. It uses less water than soil based methods and lets you avoid common pests and many soil based diseases.
There are many different methods of hydroponics: Deep Water Culture (DWC), Ebb N' Flow (also known as flood and drain), Nutrient Film Technique (NFT), but they all have this in common: nutrients are dissolved in water and then delivered directly to the plant's roots. You have exact control of the nutrients that your plants get so you'll get consistent and reproducible results from grow to grow.
If you're doing commercial growing then you can see why this is appealing. You might be limited by space, or number of plants that you're allowed to grow at time. If you can grow larger plants more quickly, all while saving money by using less water and getting extremely consistent results then why wouldn't you?
These hydroponic methods have been around for decades (some for much much longer), with tons and tons of literature to back up their effectiveness. It is not risky unproved technology. Hopefully all of this all sounds as exciting to you as it did to me when I first got into hydroponics.
Should I Grow With Hydroponics?
If you're growing indoors, there are many reasons that hydroponics just makes sense.
We're indoor gardeners.
What's our big advantage over outdoor gardeners? We get complete control over our environment.
What's their big advantage? Space. They have tons of it. They also get free water when it rains.
Hydroponics lets us play to our strengths by optimizing nutrient delivery. You get far more control than growing in soil pots. This means our plants will be big and grow fast. We can also grow more plants per square foot, which is great when space is limited.
The big monthly expenses for commercial growers tend to be rent, water, electricity, and nutrients. Hydroponics helps us with two of those: water and nutrients. Depending on your hydroponic setup, you can expect to use up to 90% less water than soil growers. For a big grow operation this could be a huge savings! You'll also be using far less nutrients, and if you've grown before you know how expensive those can be.
When Not to Use Hydroponics
Despite all of its benefits, there are some good reasons to not go with hydroponics.
If you have to grow organic. To get organic certification for your crop you probably can’t grow hydroponically. You need soil for that.
If you want to be super hands off. Hydroponics doesn't require too much maintenance but you'll still have to check on your plants and pH levels regularly. Growing with soil is still the most forgiving method.
If all your friends use soil. It's hard to overstate how helpful a good mentor is. When you're starting out it can be invaluable to have someone that is experienced to help you avoid all of the easy to make beginner mistakes. If all of you're potential mentors use soil then you should probably do that too. It would be silly to not leverage all of their experience to get great results right away. After you've gotten more confidence and a few grows under your belt, think about switching to hydroponics.
If you're on a super tight budget. In the long run, you're going to save money growing with hydroponics because of the higher yields and lower water and nutrient requirements. But sometimes when you're just getting started cash can be tight! Pots and soil are going to be cheaper than a hydroponic setup and will get the job done.
You're a super connoisseur. I thought this was worth mentioning, some people think that soil grown plants taste better and are more enjoyable. In the end, that's a matter of preference and many award winning crops are grown hydroponically.
Will I like it?
Ok, this part is super important! You're growing because you enjoy it, right? Well, hydroponics should be something that you actually enjoy doing. If getting out of bed and sticking your hand into a batch of fresh soil is what gets you going then why bother with hydroponics? Do what makes you happy.
First thing's first - You CAN do it. I know some people see these hydroponic systems and think "nope nope nope I'll stick to soil thank you very much". I completely understand. But, hydroponics doesn’t have to be scary!
If you can grow with soil, you can grow with hydroponics.
If you've never grown before, hydroponics is beginner friendly and you WILL be successful.
That being said, it definitely is more fun for a certain kind of person:
- Do you like to tinker and tune with things to optimize performance?
- Do you like toys and gadgets?
- Are you looking for reproducible and consistent results with every grow?
- Are you in it for the long term and ok with a larger initial investment for long term savings?
If you said "yes" to most or all of these questions then hydroponics is a good fit.
What's Next?
I hope you're excited and ready to try out growing with hydroponics.
Need help planning out your perfect grow room? We'll do a free consultation and help you get everything you need to start growing!
Just sign up here to get in touch with one of our expert growers.
Any questions? Either leave a comment or shoot me an email at trevor@allgreenhydroponics.com
- Trevor
Bubble Flow Bucket Nutrient Guide 0
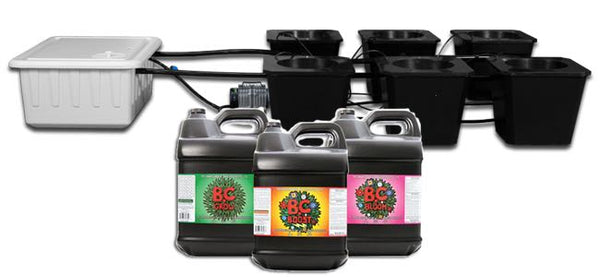
Knowing what kind and how much nutrients to use can be confusing for new growers. This guide is to help growers using one of our most popular systems, the SuperCloset Bubble Flow Buckets.
If possible, I always recommend buying all the nutrients you'll need for your grow beforehand. It allows you to buy in bulk and save some money and will keep you from making emergency runs to your hydro shop (or rushing shipping) when you realize you're out.
Whatever you do, don't let your babies starve!
The amount of nutrients you'll need will depends on a lot of factors so let's make some assumptions to use for our calculations.
1) We're using a 6 Site Bubble Flow Bucket system.
It comes with a 25 Gallon reservoir and 5 Gallon sites. For the 6-Site system that means we'll have about 55 gallons (25 from the reservoir and 30 from all 6 buckets) for maximum capacity, but let's plan around using 50 gallons.
Here's what each system can hold:
| Sites | Amount of Water |
| 6 | 50 Gallons |
| 12 | 75 Gallons |
| 24 | 150 Gallons |
If you have a 12 Site then multiply everything by 1.5 and if you have a 24 Site then multiply by 2.
If you're using another system, hopefully you can use the same technique to find out how much you'll need.
2) We're going to use TechnaFlora nutrients.
They're reliable and known to work well for hydroponics. I used their nutrient calculator to get most of these numbers.
3) We'll have a 6 week vegetative phase and 10 week flowering phase.
This is an overestimate but it's always better to have a little extra than not enough.
4) We'll plan to change the water every 2 weeks.
You can change your water weekly but you'll use twice as much nutrients and usually won't get much out of it.
This means we'll have 3 water changes in our 6 weeks of veg and 5 water changes in our 10 weeks of flowering.
OK, now let's look at how much nutrients we'll need. To keep things short, I'm not going to go into much detail about why we're using each nutrient.
Single Water Change - Vegetative
| Nutrient | Amount |
| B.C Boost | 3⅛ cups (.75 liters) |
| B.C Grow | 1½ cups (.36 liters) |
| Thrive Alive B-1 Red | ½ cups (.12 liters) |
| MagiCal | ½ cups (.12 liters) |
| SugarDaddy | 2 cups (.48 liters) |
Single Water Change - Flowering
| Nutrient | Amount Needed |
| B.C Boost | 3⅛ cups (.75 liters) |
| B.C Bloom | 3⅛ cups (.75 liters) |
| Awesome Blossom | ½ cups (.12 liters) |
| Thrive Alive B-1 Red | ½ cups (.12 liters) |
| MagiCal | ½ cups (.12 liters) |
| SugarDaddy | 2½ cups (.6 liters) |
So what will you need in the end? We'll multiply what we need for a single water change in veg by 3 and what we need for a single water change in flowering by 5 to get our totals.
Total Nutrients
| Nutrient | Vegetative | Flowering | Total |
| B.C Boost | 2.25 liters | 3.75 liters | 6 liters |
| B.C Grow | 1.08 liters | - | 1.08 liters |
| B.C Bloom | - | 3.75 liters | 3.75 liters |
| Awesome Blossom | .6 liters | .6 liters | |
| Thrive Alive B-1 Red | .36 liters | .6 liters | .96 liters |
| MagiCal | .36 liters | .6 liters | .96 liters |
| SugarDaddy | 1.5 liters | 3 liters | 4.5 liters |
What to Buy
Unfortunately, you can't buy these exact amounts of nutrients. They're mostly available in 1 L, 4 L, and 10 L containers. Here's what I think makes the most sense based on what's available and pricing (at time of writing).
B.C Boost, 10 L

Provides Calcium and Iron that your plants will need for both vegetation and flowering.
Note: It's about the same price as two 4 liter bottles, might as well get the extra
B.C Grow, 4L

Contains a full compliment of nutrients for vegetative growth.
Note: It's about the same price as two 1 liters, you'll have a lot extra.
B.C Bloom, 4L

Contains a full compliment of nutrients for healthy bloom / flowering.
Awesome Blossom, 1L

This ultra-fertilizer will increase your harvest size by providing a boost of sugar phosphates.
Thrive Alive B-1 Red, 1 L

A plant tonic that encourages healthy root development.
MagiCal, 1 L

A blend of magnesium, iron and calcium that promotes vigorous and healthy plant growth
1x Sugar Daddy, 4 L and 1x Sugar Daddy, 1L


Supplies essential carbohydrates and all twenty amino acids necessary in all phases of plant growth.
Notes: You could also go with the 10 L option if you want to have enough for your next grow too.
There you have it. That should be everything you need for vegetation and flowering. Hope that helps!
- Trevor
- Tags: Beginner Guide Hydroponics Nutrients SuperCloset
Monitoring Carbon Dioxide CO2 Levels in Your Grow Room 0
If you're using CO2 enrichment in your grow room then you're going to want to make sure you've got an accurate measurements of your CO2 levels.
Typical ambient carbon dioxide levels are around 400 PPMs, but if you really want to supercharge your plant growth and increase your yields by up to 20-40% then you're going to want to target around 1500 PPMs.
We can talk more about CO2 enrichment techniques for your indoor garden in another post, but for now I just wanted to share some good CO2 monitoring tools that I've found. These will give you accurate readings of your carbon dioxide levels so you can tell if your enrichment technique is working properly.
1) AutoPilot Desktop CO2 Monitor - $119.99

This is a solid option for your grow room.
Pros
- Measures CO2 Levels as well as temperature and humidity.
- Has special calibrations for high altitude growers (I'm looking at you, Coloradons).
- Can log CO2 levels throughout the day (easy to transfer to your computer for later analysis)
Cons
- Has to be plugged in at all times, no battery mode.
2) CO2Meter Mini CO2 Monitor - $89.00 (at time of writing)

This one is designed for air quality measurements but will work just fine for indoor gardening.
Pros
- Good budget option
- Comes with software for logging CO2 levels over time
Cons
- Has to be plugged in at all times, no battery mode.
- Only measures CO2 levels, not temperature or humidity
3) Titan Controls Atlas 5 Portable Handheld Carbon Dioxide Temperature and Humidity Monitor - $215.89 (at time of writing)

Now we're getting serious. This portable CO2 monitor is the top of the line option.
Pros
- Measures CO2 Levels as well as temperature and humidity.
- Battery powered and portable, no need to plug it in. (4 AAs)
Cons
- A bit pricier
- Trevor
- Tags: Buyers Guide CO2 Hydroponics
Five Fruits and Vegetables for Your Hydroponic Garden 0
You’ve got your hydroponic system, now what? It’s time to get growing!
Let’s look at 5 fruits and vegetables that are ideal for growing in your indoor garden.
1. Spinach
The health benefits of this leafy green vegetable makes it a great addition to any healthy diet; spinach can be juiced, sautéed or eaten raw. This unassuming plant is right on top of the list of plants that a beginner can grow in a hydroponic garden. Spinach grown using this method can be harvested all at once, or snipped off bit by bit, leaving the rest of the plant to keep growing.
2. Lettuce
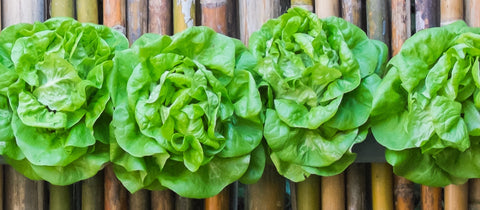
Like all leafy green vegetables, lettuce is a great base for sandwiches and salads. The heads grow rapidly, and are easy to take care of. Good choices are Boston, bib, or butter crunch leaf lettuce. Lettuce is perfect for indoor hydroponic gardens because it gets protected from the sun, keeping it from burning. In many cases, the shade can buy a few more weeks of harvest time than you’ll have from lettuce grown in the sun. Lettuce requires cool ambient temperatures of around 75 degrees Fahrenheit during the day and 55 degrees Fahrenheit at night.
3. Strawberries
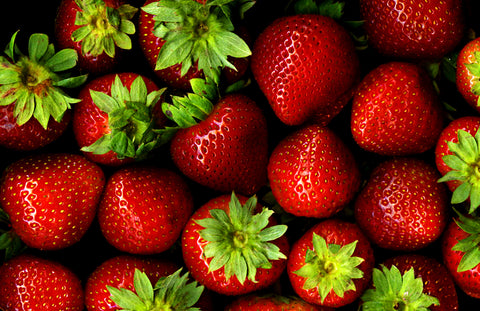
Imagine having fresh, homegrown strawberries at your disposal all year round! To get started, you will need to purchase a few strawberry starter runners from a garden supply store, and throw them in your refrigerator. This cold stimulation is designed to help jumpstart the growing process, which means that the strawberry plants will be able to flower soon after planting.
4. Tomatoes
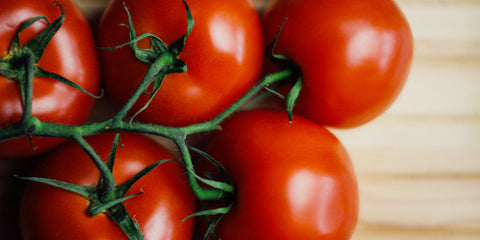
Useful in so many dishes, tomatoes are both nutritious and flavorful. The fact that tomatoes are vine plants makes growing these fruits in a DWC (Deep Water Culture) hydroponic system piece of cake. We recommend disease resistant varieties such as Daniela as this reduces the level of care required.
If you’re growing tomatoes you’ll need a trellis or some other kind of support system so the vines can grow out. They prefer a warm growing temperatures so the daytime temperature should be ideally set at 70-79 degrees Fahrenheit and 61-65 degrees Fahrenheit at night.
5. Peppers
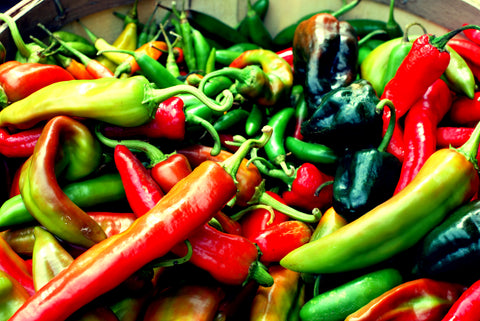
Peppers are relatively easy to grow. They prefer warm growing temperatures, similar to tomatoes. However, fruit production can be raised by increasing the nighttime temperatures and slightly decreasing the daytime temperatures while ensuring that they are irrigated with feeding solution up to 6 times a day. Avoid bell peppers unless you have plenty of space in your system. The best pepper varieties to grow hydroponically include green peppers or hot peppers such as cayenne, habanero, and jalapeños.
What have you had success growing in your indoor garden? Good luck with your growing!
- Trevor
- Tags: Beginner Guide Hydroponics
How to Use Your Bubble Magic Extracting Washing Machine 0
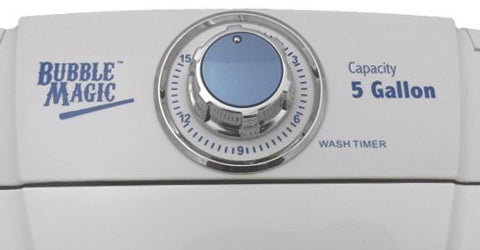
So you’ve got your new Bubble Magic Extracting Washing Machine and now you’re wondering how to use it?
We’ve got some simple instructions to help you get started with ice water extraction (IWE).
This is a super easy process, doesn’t take too long, and is a great way to make lavender and other herbal extracts.
Here’s what you’ll need before we get started:
- Bubble Magic Extraction Machine: Five or Twenty Gallon model
- 1 Zipper Washing Extraction Bag
- Set of Extraction Bags (Depending on the set, this could be a set of 3,4,5, or 8 bags)
- 1 bucket equivalent in size to your extraction machine. 5 Gallon bucket for 5 Gallon Extracting Machines, 20 Gallon Bucket for 20 Gallon Extracting Machines.
- Ice and water — Preferably RO (Reverse Osmosis) water for best results.
- Flat drying sheet (For when we’re done)
- The plant material — It’s best if this has been in the freezer for at least one hour before starting the extraction process.
1) Prepare your bags and bucket
Line your bucket with extraction bags. Start with the lowest micron bag you have. This should be the 25 micron bag. Once that’s in, line the bucket with the next largest bag. Repeat until all your bags are lining the bucket with the largest micron bag (typically the 220 micron bag) on top.
2) Prepare the extraction machine
Fill the machine to about half way with a mixture of RO water and ice. A temperature of about 41 F is ideal.
3) Prepare your plant material
Add your frozen (remember, it should have been in the freezer for at least an hour before starting!) plant material to your washing extraction bag.
Zip it up. Don’t forget to double check the zipper to be safe.
4 ounces is a good amount of material for the 5 gallon machine.
4) Add the plant material and start the Bubble Magic Extracting Machine
Place the bag containing your plant material into the extracting machine. Add more RO water and ice until the machine is full.
Set the timer for 15 minutes and let the machine go to work!
You should see a nice foamy head with the machine running.
5) Remove the bag
Once the 15 minutes are up it’s time to drain. Start by taking the bag out of the machine. Squeeze any excess water/plant mixture out of the bag and into the machine then set the bag aside.
We’re done with it.
6) Drain
Take the drain hose and place it into the bucket/bag setup we made earlier. Switch the machine into drain mode and let the mixture flow out. Rinse the machine with water to get everything drained out.
7) Collect
Slowly remove the top bag from the bucket. Rinse with water to flush any excess material. Turn it inside out and collect your material. Place it on the drying sheet. Repeat for each bag.
There you have it, you’re done! Hope that helps. If you have any other ice water extraction tips, let us know, we’d love to hear them!
If you're interested in getting started with ice water extraction we have the 5 Gallon Bubble Magic Extracting Machine plus Extraction Bags as well as the 20 Gallon Bubble Magic Extracting Machine plus Extraction Bags available in the store!